
Proper Way To Rack Pool: Mastering The Art Of Pool Table Setup
Alright folks, let’s dive into something that every pool enthusiast needs to know—the proper way to rack pool. Imagine this—you’ve got your friends over for a friendly game, but then someone screws up the rack, and the whole vibe gets awkward. Sound familiar? Well, today we’re here to fix that mess. Let’s master the art of setting up the perfect pool table like a pro and make sure every game feels like a tournament.
Whether you're a seasoned player or just starting out, understanding how to properly rack the balls is crucial. It's not just about stacking them up—it’s about creating the right setup to ensure fair play and maximum enjoyment. So buckle up, because we’re about to break down the process step by step.
Now, before we jump into the nitty-gritty, let me tell you why this matters so much. A well-racked table can make or break your game. Think of it as the foundation of every shot you take. And trust me, nothing ruins a good game faster than a lopsided rack or misplaced balls. Ready to learn the proper way to rack pool? Let’s go!
- Justin Trudeau Girlfriend
- Rulz Kannada 2025 Download Rulz
- Ruks Khandagle Uncut
- Danny Mozes
- How Old Is Charlie Sheen
Understanding the Basics of Pool Racking
Before we get into the details, let’s talk basics. Pool racking isn’t rocket science, but it does require some attention to detail. First things first—you need the right tools. Most people use a triangular rack, which is standard for most games. But did you know there are different types of racks depending on the game you're playing? Yep, it’s true. So let’s break it down.
Types of Racks and Their Uses
There’s more than one way to skin a cat when it comes to pool racks. Here are the most common ones you’ll encounter:
- Triangular Rack: The classic choice for 8-ball and 9-ball games.
- Diamond Rack: Used specifically for 9-ball games in some tournaments.
- Hexagonal Rack: Less common but still used in specialty games.
Each rack serves a specific purpose, so make sure you’re using the right one for your game. Now, let’s move on to the fun part—how to actually rack those balls!
Step-by-Step Guide to the Proper Way to Rack Pool
Alright, let’s get down to business. Here’s a step-by-step guide to help you master the art of pool table setup:
Step 1: Gather Your Balls
Start by collecting all 15 balls and placing them on the table. Make sure none of them are damaged or scratched. A damaged ball can throw off the entire rack, so it’s worth double-checking. Once you’ve got them all ready, let’s move on to the next step.
Step 2: Place the Rack
Position the triangular rack at the foot spot of the table. This is usually marked by a small dot or circle on the cloth. If there’s no marking, don’t worry—just place the rack near the bottom end of the table, ensuring it’s centered.
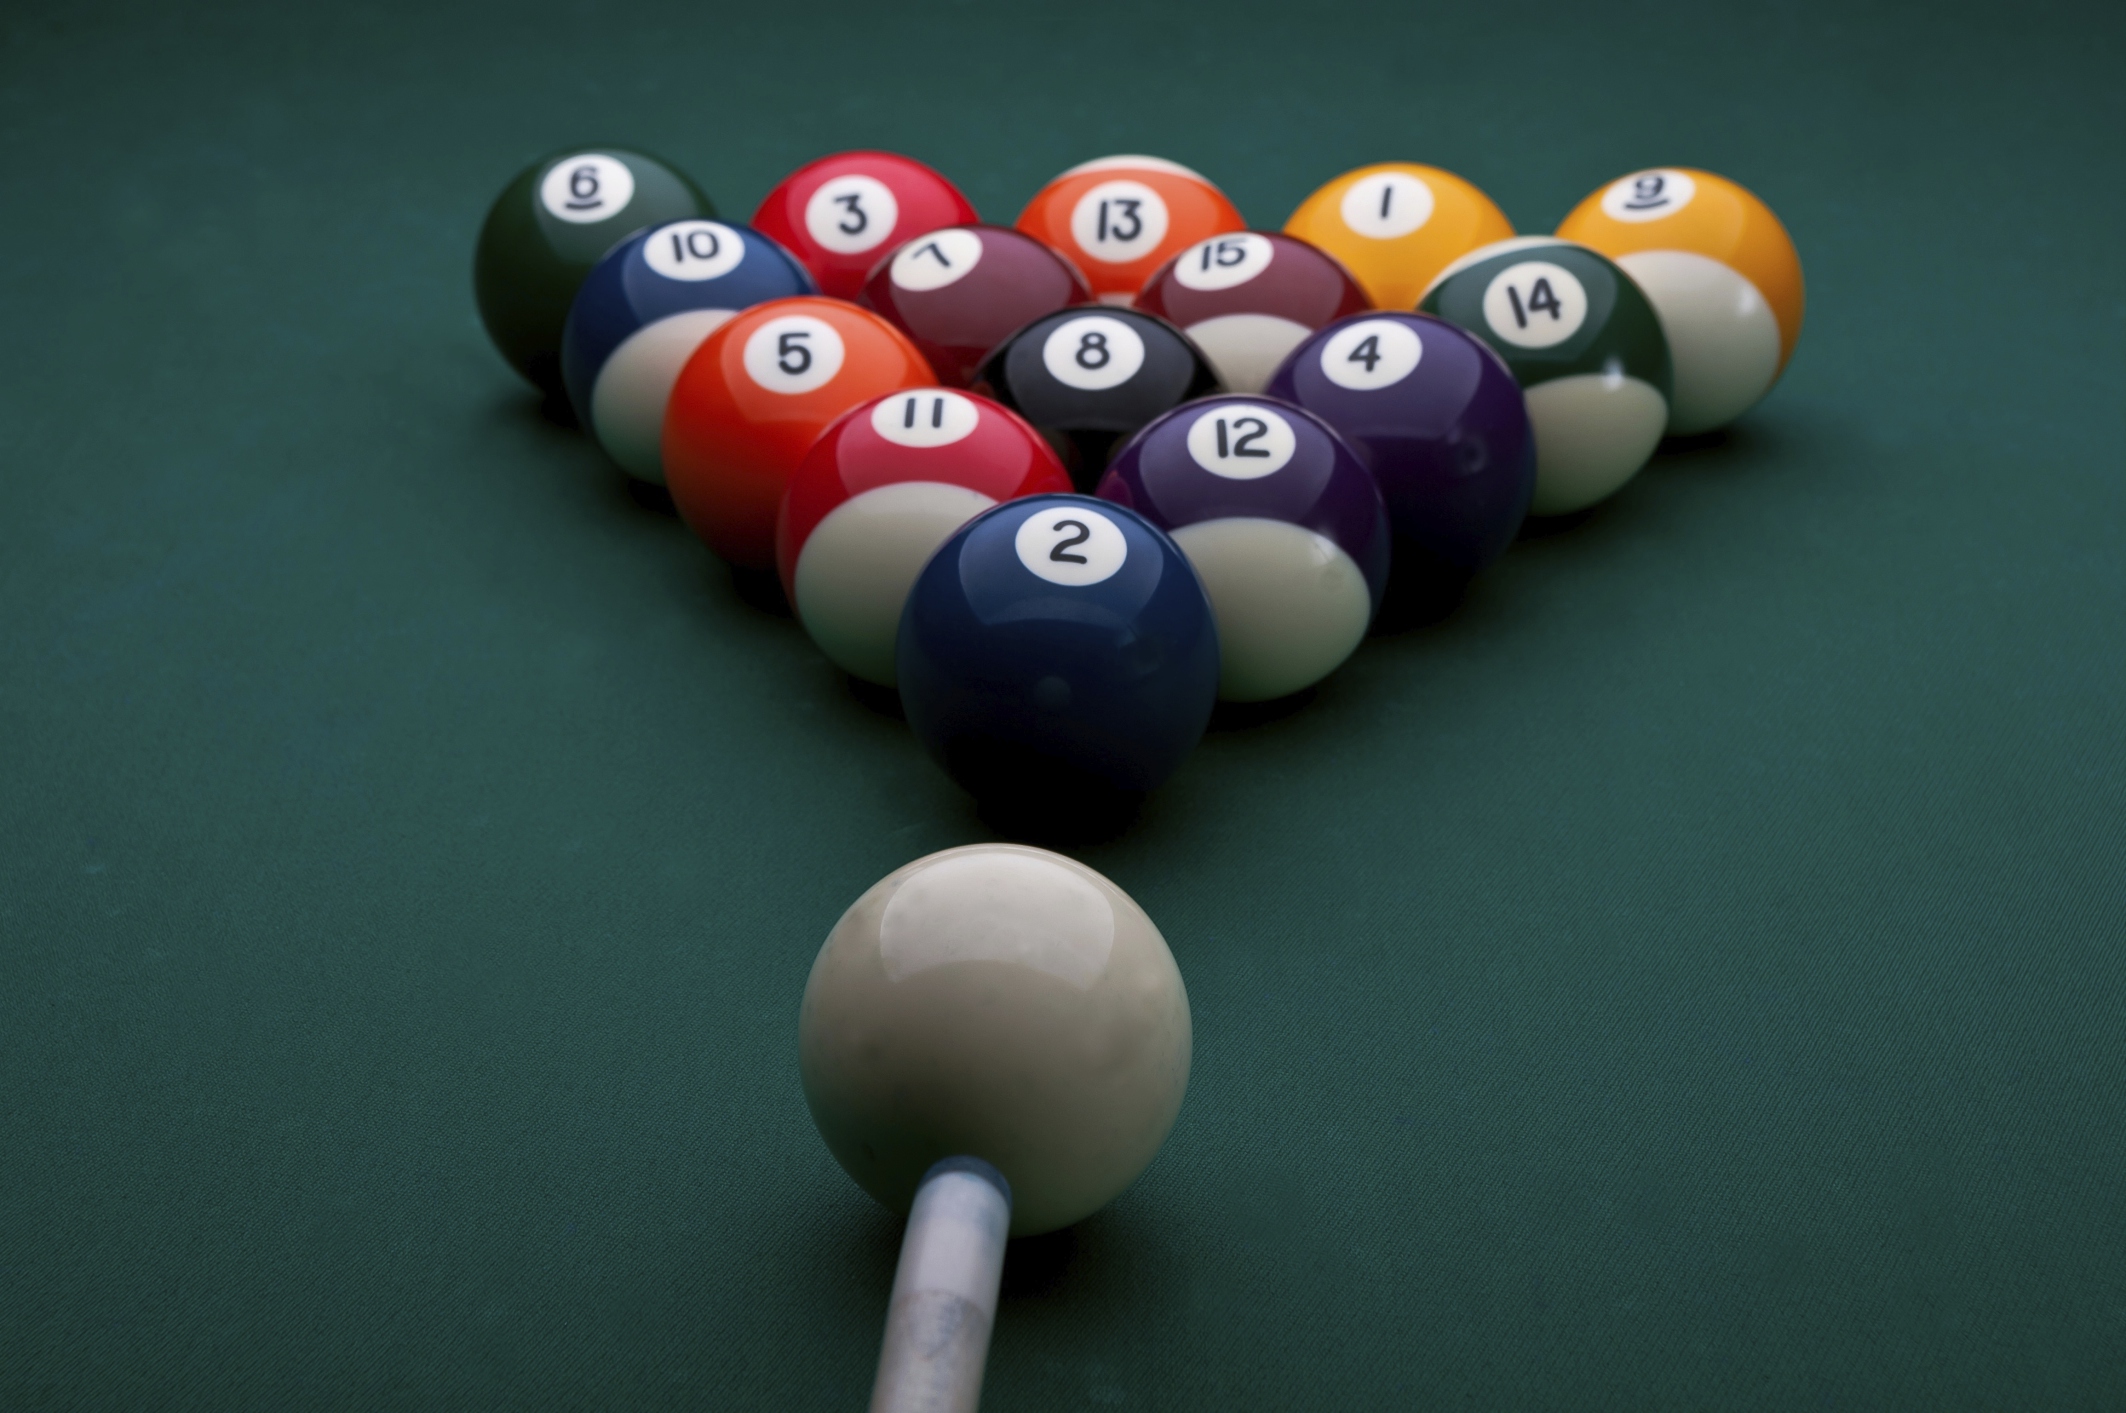
Step 3: Arrange the Balls
This is where things get interesting. Here’s how you should arrange the balls:
- The 8-ball must always go in the center of the rack.
- Place the solid and striped balls alternately around the 8-ball.
- The first ball at the tip of the rack should be a solid ball.
Trust me, this arrangement makes all the difference. It ensures a fair game and gives both players an equal chance to win.
Common Mistakes to Avoid
Now that you know the basics, let’s talk about what NOT to do. These are the most common mistakes people make when racking pool:
- Forgetting to place the 8-ball in the center.
- Not alternating solid and striped balls properly.
- Leaving gaps between the balls.
These errors might seem small, but they can ruin the game. So take your time and do it right!
Tips for a Perfect Rack
Want to take your racking skills to the next level? Here are some pro tips:
- Use a level rack to ensure all balls are evenly spaced.
- Gently press down on the rack to make sure the balls are snug.
- Practice makes perfect—keep doing it until you can do it blindfolded!
These little tricks will help you create a flawless rack every time.
Advanced Techniques for Tournament-Style Racking
Feeling confident? Let’s step it up a notch. Tournament-style racking requires precision and attention to detail. Here’s how to do it:
Step 1: Use a Precision Rack
Invest in a high-quality precision rack. These racks are designed to hold the balls tightly in place, ensuring a perfect setup every time.
Step 2: Follow the Rules
Make sure you’re following the official rules of the game. For example, in 9-ball, the 1-ball must always be at the front of the rack. In 8-ball, the 8-ball must be in the center. Simple, right?
Step 3: Practice Under Pressure
Set up a mock tournament with your friends and practice racking under pressure. This will help you stay calm during real games.
Data and Statistics on Pool Racking
Did you know that improper racking is one of the leading causes of game disputes? According to a survey conducted by the World Pool-Billiard Association, over 70% of players admit to having issues with incorrect racking at some point. That’s why mastering the proper way to rack pool is so important.
Conclusion: Take Your Game to the Next Level
There you have it—everything you need to know about the proper way to rack pool. Remember, a well-racked table is the foundation of a great game. So take your time, follow the steps, and practice regularly. And don’t forget to share this article with your friends so they can learn too!
Now it’s your turn. Have you tried these techniques? Do you have any tips of your own? Leave a comment below and let’s keep the conversation going. Happy racking, folks!
Table of Contents
Article Recommendations
- 4rulz Kannada 2024
- How Much Did Angus T Jones Make From Two And A Half Men
- Tom Felton Rogue Heroes
- Swype Vape
- Charlie Sheen

Detail Author:
- Name : Ms. Rosemarie O'Kon DVM
- Username : braun.ahmed
- Email : michael.carter@quigley.com
- Birthdate : 1971-08-26
- Address : 2541 Ward Locks Apt. 389 Lednerberg, MN 11935-9219
- Phone : +1 (850) 234-5552
- Company : Rippin-Schaefer
- Job : Hand Trimmer
- Bio : Et quia possimus perspiciatis aliquid maiores. Ipsum aut quae dolore deserunt optio facilis dolorem. Nisi eveniet adipisci explicabo reprehenderit nemo autem.
Socials
facebook:
- url : https://facebook.com/major6139
- username : major6139
- bio : Alias voluptates ea excepturi corrupti corrupti qui eius consequuntur.
- followers : 6267
- following : 2766
tiktok:
- url : https://tiktok.com/@major.huels
- username : major.huels
- bio : Non distinctio ex fugit sunt reiciendis et accusamus nostrum.
- followers : 3686
- following : 2549
